[Nest.js] websocket 클라이언트로 ack 보내기
![[Nest.js] websocket 클라이언트로 ack 보내기](https://cdn.jsdelivr.net/gh/NicoDora/nicodora.github.io/assets/img/nestjs/2025-03-24-Nestjs-websocket-클라이언트로-ack-보내기/send-ack.png)
NestJS의 websocket 라이브러리를 사용해 웹소켓을 구현할 때 클라이언트로 ack를 보내는 방법을 알아봅시다.
문제
프로젝트에서 웹소켓을 사용해서 1대1 채팅을 구현하고 있었는데 일단 코드는 이렇게 구현했었는데요.
export class ChatMessageGateway
implements OnGatewayConnection, OnGatewayDisconnect
{
constructor(
@Inject(CHAT_ROOM_REPOSITORY_DI_TOKEN)
private readonly chatRoomRepository: ChatRoomRepositoryPort,
@Inject(APP_JWT_SERVICE_DI_TOKEN)
private readonly appJwtService: AppJwtServicePort,
@Inject(WINSTON_MODULE_NEST_PROVIDER)
private readonly logger: Logger,
private readonly commandBus: CommandBus,
) {}
@WebSocketServer()
server: Server;
async handleConnection(socket: SocketWithUserDto) {
...
}
async handleDisconnect(socket: SocketWithUserDto) {
...
}
@UsePipes(customValidationPipe)
@UseFilters(SocketCatchHttpExceptionFilter)
@SubscribeMessage('enter_chat_room')
async enterChat(
@MessageBody() data: EnterChatDto,
@ConnectedSocket() socket: SocketWithUserDto,
) {
const { roomId } = data;
const chatRoom = await this.chatRoomRepository.findOneById(roomId);
if (isNil(chatRoom)) {
this.logger.error(
`[Socket] enter_chat_room failed: Room ${roomId} does not exist`,
);
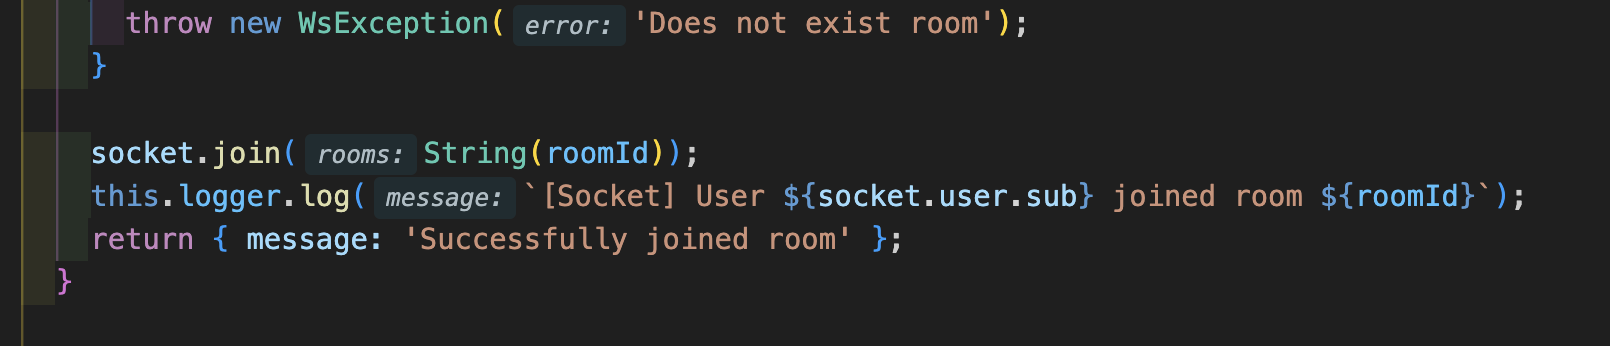
throw new WsException('Does not exist room');
}
socket.join(String(roomId));
this.logger.log(`[Socket] User ${socket.user.sub} joined room ${roomId}`);
}
@UsePipes(customValidationPipe)
@UseFilters(SocketCatchHttpExceptionFilter)
@SubscribeMessage('send_message')
async sendMessage(
@MessageBody() data: CreateChatMessageDto,
@ConnectedSocket() socket: SocketWithUserDto,
) {
const { roomId, message, blogPostUrl } = data;
const { sub: userId } = socket.user;
this.logger.log(
`[Socket] Received message from ${userId} in room ${roomId}: ${message}`,
);
const command = new CreateChatMessageCommand({
roomId: BigInt(roomId),
userId: BigInt(userId),
message,
blogPostUrl,
});
this.logger.log(
`[Socket] Sending message from ${userId} in room ${roomId}: ${message}, ${blogPostUrl}`,
);
await this.commandBus.execute<CreateChatMessageCommand, void>(command);
socket
.to(String(roomId))
.emit('receive_message', { senderId: userId, message, blogPostUrl });
this.logger.log(
`[Socket] Message emitted to room ${roomId} from ${userId}`,
);
}
}
postman에서 enter_chat_room 이벤트와 send_message 이벤트를 테스트 해보면 결과는 아래와 같습니다.
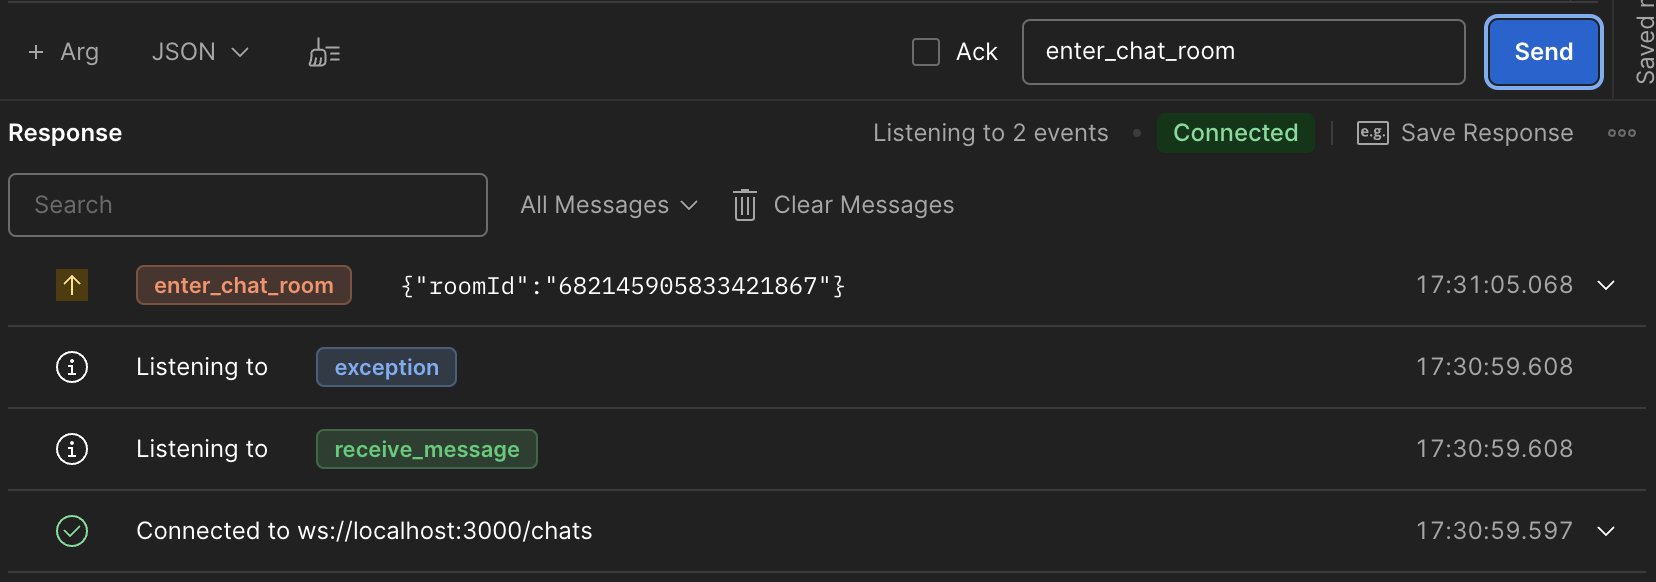
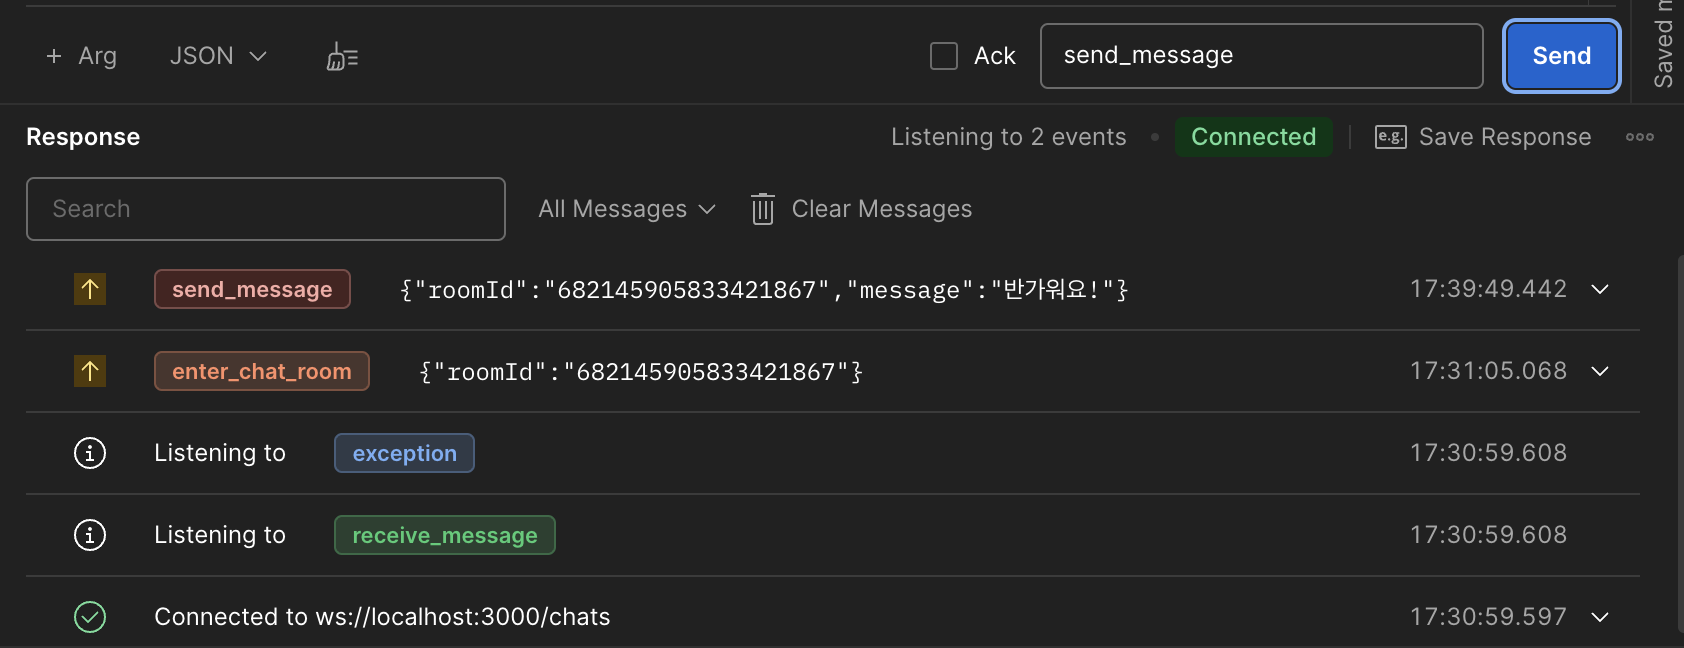
postman에서는 이벤트 결과를 확인할 수 있지만 실제로 클라이언트에서는 이벤트 결과를 확인하기 힘들다고 하더라구요. 소켓 통신 테스트 과정에서 send_message 이벤트를 보냈을 때 메시지가 전송되지 않는 문제가 있었는데 이게 채팅방에 입장이 안된건지, 진짜 메시지가 전송이 안된건지 확인하기 힘들었습니다.
그래서 웹소켓에서도 http 요청처럼 응답을 보낼 수 있는 방법이 있나 찾아보다가 ack(acknowledgement)를 응답으로 보내는 방법을 발견하게 되었습니다.
해결방법 (ack 보내기)
ack를 보내게 되면 클라이언트에서 callback 함수를 통해서 응답을 받을 수 있습니다.
ack를 보내는 방법은 생각보다 간단했습니다.
그냥 이렇게 이벤트 함수 안에 return값을 추가해주면 됩니다!
클라이언트에선 callback 함수를 통해서 ack를 확인할 수 있는데, 일단 코드를 커밋하기 전에 postman에서 테스트를 해봐야겠죠?
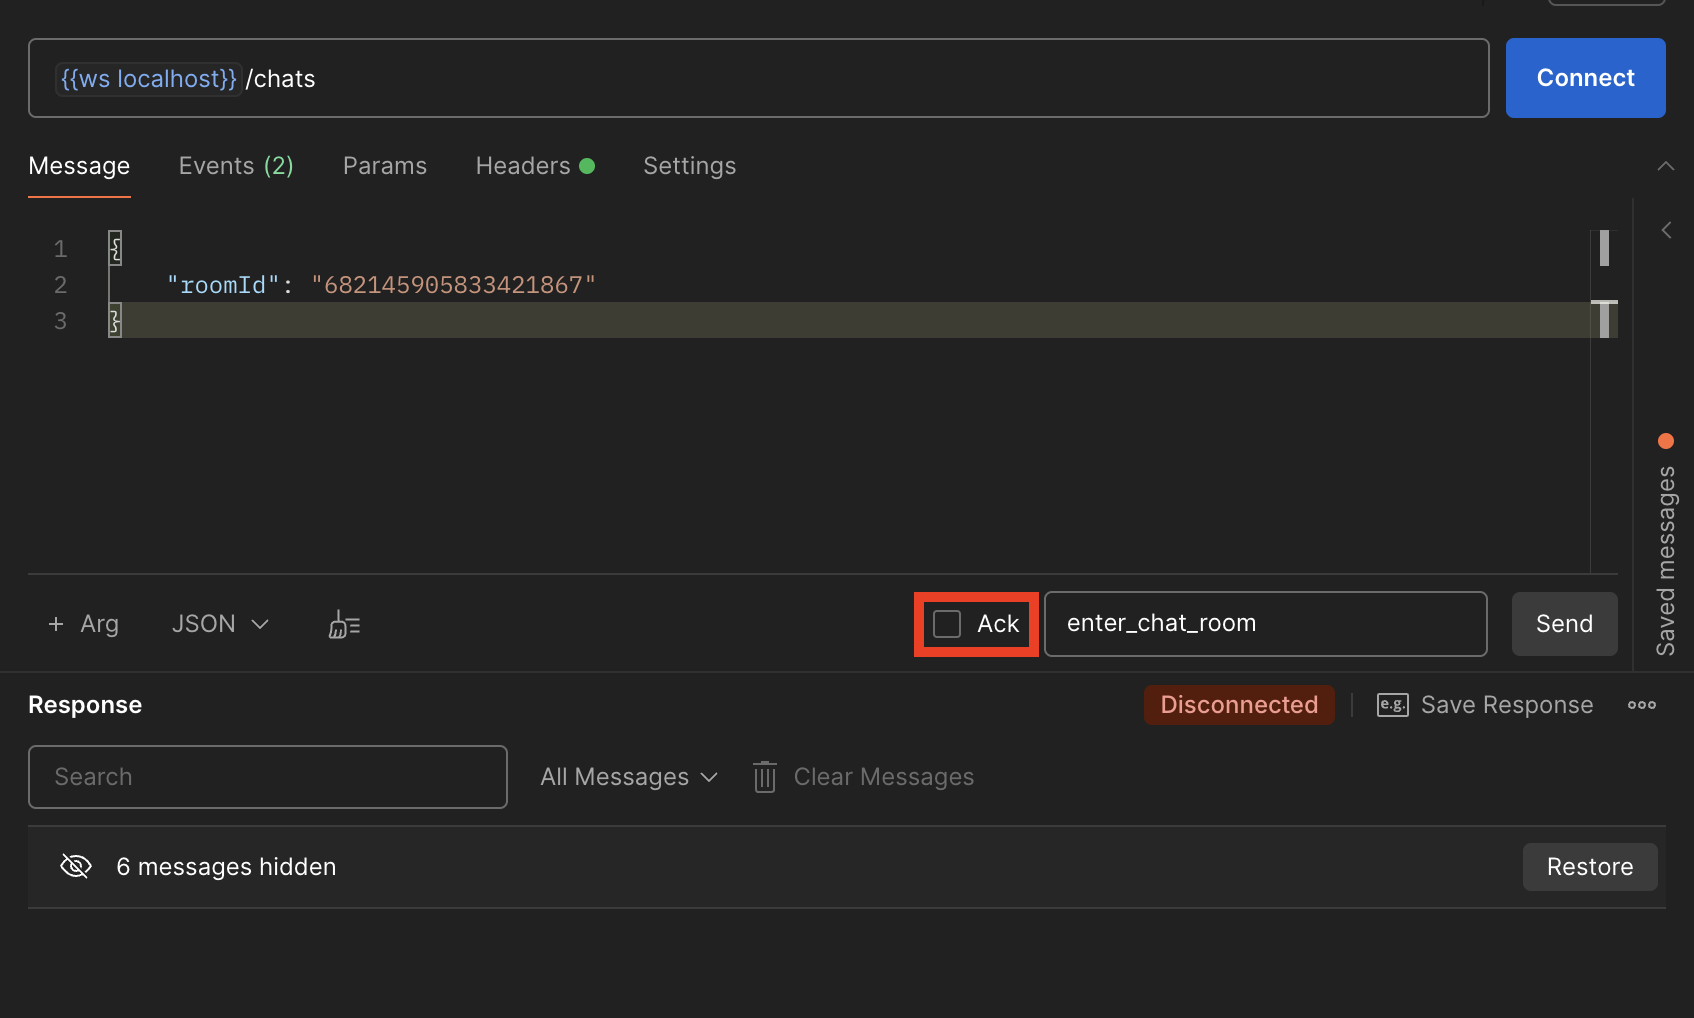
postman에서 ack를 받는 방법도 엄청 간단합니다. 그냥 Ack 버튼을 눌러 활성화해주면 됩니다.
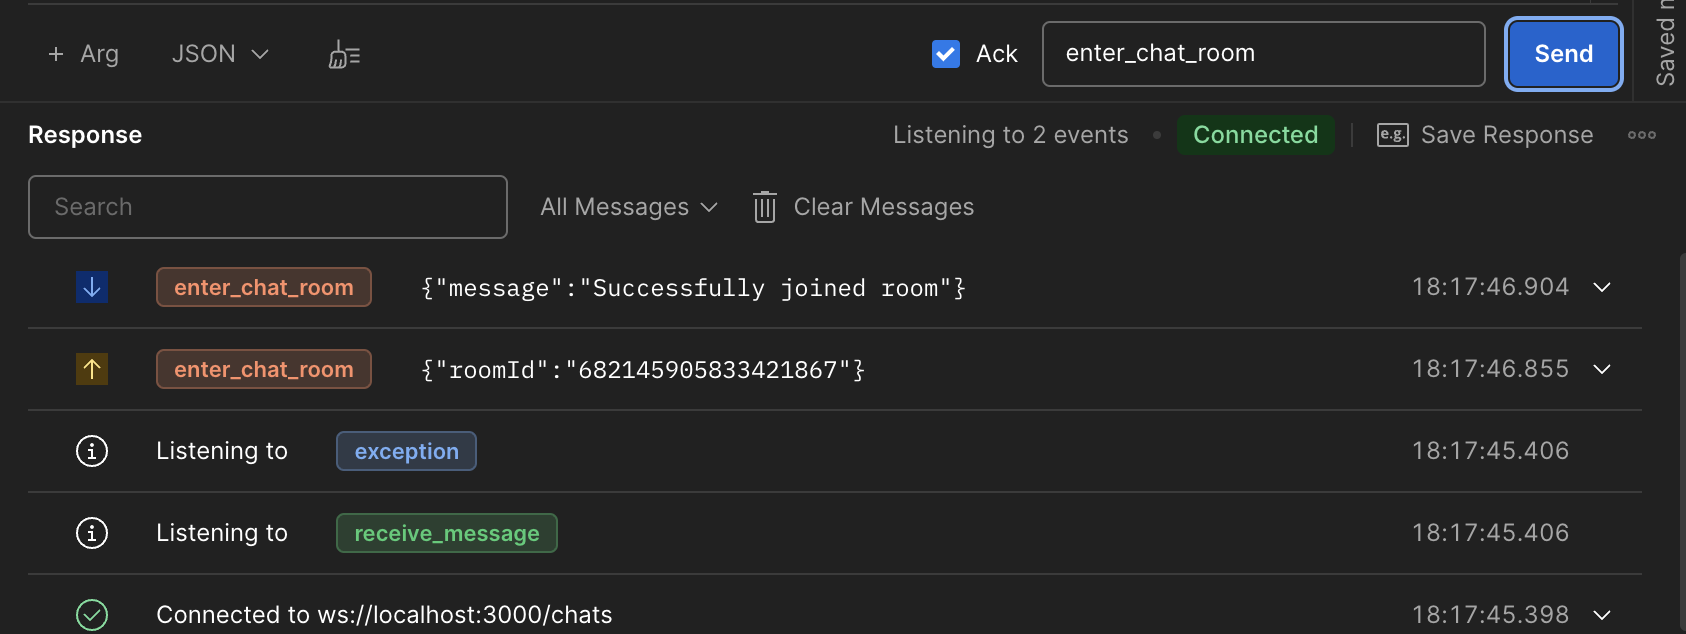
이제 postman에서 enter_chat_room 이벤트를 테스트 해보면 아래와 같이 ack를 받을 수 있습니다.
마치며
ack를 보내게 되면 클라이언트 입장에서 메시지가 전송이 되었는지 확인할 수 있기 때문에 소켓 통신을 테스트할 때 유용하게 사용할 수 있을거 같습니다.
그럼 다음 포스트에서 뵙겠습니다! 뾰로롱~